
DIY Outdoor Home Improvement Projects: Quick and Easy Ideas for Your Space
Homeowners are increasingly seeking ways to improve their outdoor spaces, turning their backyards into personalized retreats. With the right planning and some elbow grease, anyone can tackle a range of DIY outdoor home improvement projects. From cozy, welcoming patios to lush, vibrant gardens, these creations can add value to your home and provide a space for relaxation and entertaining.
Many outdoor projects focus on creating functional and visually appealing areas that cater to individual tastes and styles. This may include designing and building decks and patios, incorporating water and weather protection elements, or adding thoughtful landscaping and garden features. With the right resources and inspiration, you can truly make your outdoor space a reflection of your personality and lifestyle.
Key Takeaways from DIY Outdoor Home Improvement Projects
- Outdoor improvement projects can transform your backyard into a personalized retreat
- DIY projects may include decks, patios, landscaping, and weather protection features
- Find inspiration and resources, such as 27 DIY outdoor project ideas for a dream backyard, to make your outdoor space uniquely yours.
Planning Your Outdoor Project
Assessing Your Space and Needs
Before diving into any DIY outdoor home improvement projects, it’s important to assess your space and needs. Take a good look at your yard, and consider the following aspects:
- Size of the outdoor space: Is it big enough for the project you’re envisioning, or will you need to adjust the design to fit the space?
- Existing features: Are there any existing trees, shrubs, or structures that may impact your project?
- Family needs: What do you and your family want to use this space for? Keep in mind both practical and recreational purposes.
- Low maintenance: Design ideas that require minimal upkeep are ideal for busy homeowners.
Choosing the Right Materials
Once you have a better understanding of your space and needs, the next step is to choose the right materials. Make a list of potential materials to use, keeping in mind the following factors:
- Durability: Outdoor materials must withstand various weather conditions. Ensure they are designed to avoid corrosion, rot, and fading.
- Aesthetics: Choose materials that complement your home’s overall design.
- Cost: Consider your budget when selecting materials, and opt for cost-effective options where possible.
- Eco-friendliness: Sustainable materials, such as reclaimed wood or recycled plastic, lessen the environmental impact of your project.
Drawing Up a Project Plan
With a clear vision of your outdoor space and the preferred materials, it’s time to draw up a project plan. A well-organized plan can help ensure a successful and stress-free project completion. Incorporate the following elements:
- Outline your goals: Clearly define your project objectives, including the main purpose of your outdoor space.
- Create a timeline: Determine the full scope of your project and schedule tasks accordingly.
- Budget: Calculate the anticipated expenses for each stage of the project.
Consider using a table to compile your project plan, i.e.:
| Goals | Timeline | Budget |
|---|---|---|
| Create a seating area | 1 week | $500 |
| Plant a vegetable garden | 2 weekends | $250 |
| Set up outdoor lighting | 3 days | $200 |
By following these steps, you’ll be well on your way to completing an outstanding DIY outdoor home improvement project that transforms your yard into a functional and enjoyable space.
DIY Deck and Patio Projects
Building a Deck From Scratch
Building a deck from scratch can be an exciting and rewarding project. Start by planning the deck’s dimensions, layout, and materials. Pressure-treated wood is a popular choice for its durability and affordability. For the foundation, you’ll need concrete footings and posts. Use corrosion-resistant screws to connect the joists and beams.
Choosing the right deck railing is essential, as it not only adds an aesthetic appeal but also ensures safety. You can explore various railing materials, such as metal, vinyl, or wood. Don’t forget to incorporate granite steps or accents for added elegance and durability.
The 34 Awesome DIY Backyard Ideas website has many inspiring outdoor DIY projects that can help you find ideas for your dream deck.
Patio Layover with New Tiles
If you’re considering revamping your patio, laying new tiles is an excellent way to freshen up the look and increase the patio’s functionality. Whether you prefer porcelain, ceramic, or natural stone, there is a myriad of tile options to suit your taste and budget.
Start by removing the old tiles or any existing surface materials. Ensure that the base is clean, even, and compact before applying a layer of screed for the new tiles to adhere to. The screed promotes better adhesion and creates a uniform surface.
For cutting and shaping, you may need a wet tile saw and a tile nipper. Once all tiles are set, go ahead and fill the spaces with grout. Finish by cleaning the surface with a damp sponge and enjoy your renewed patio!
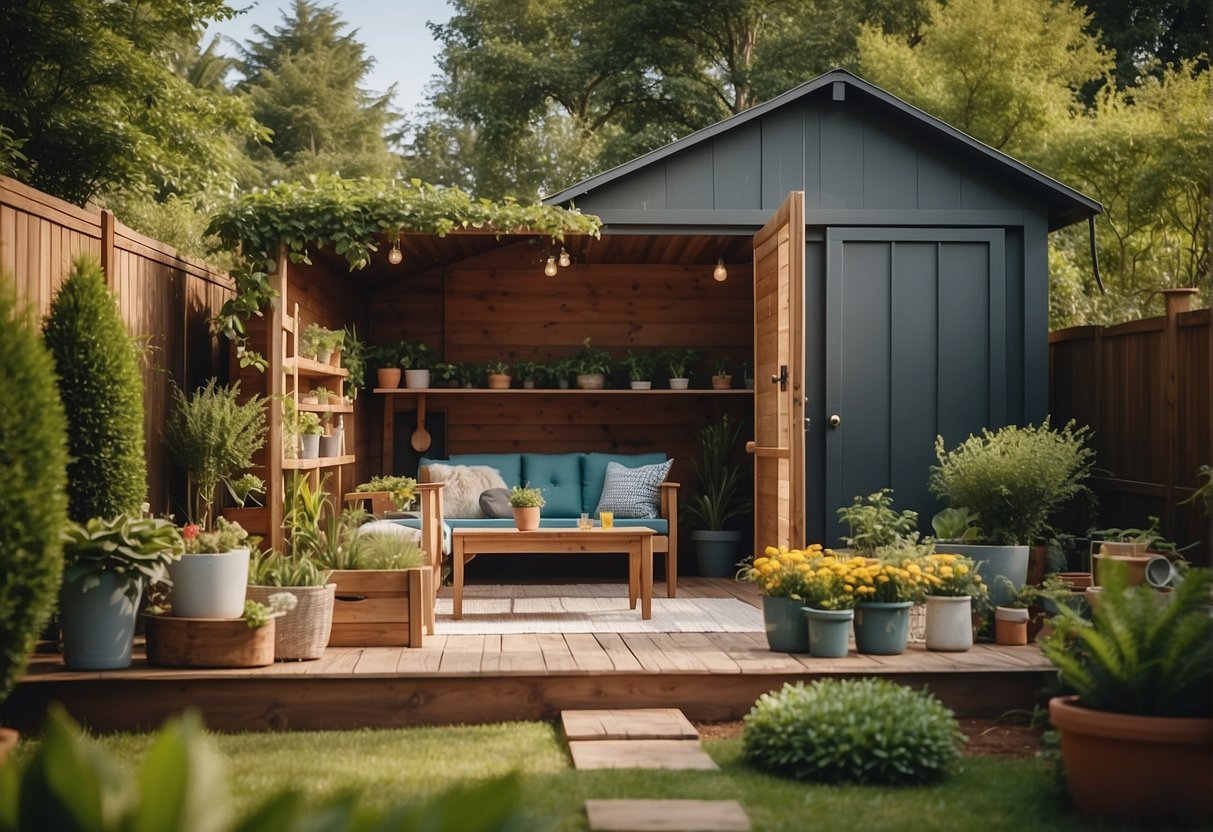
Creating Outdoor Rooms
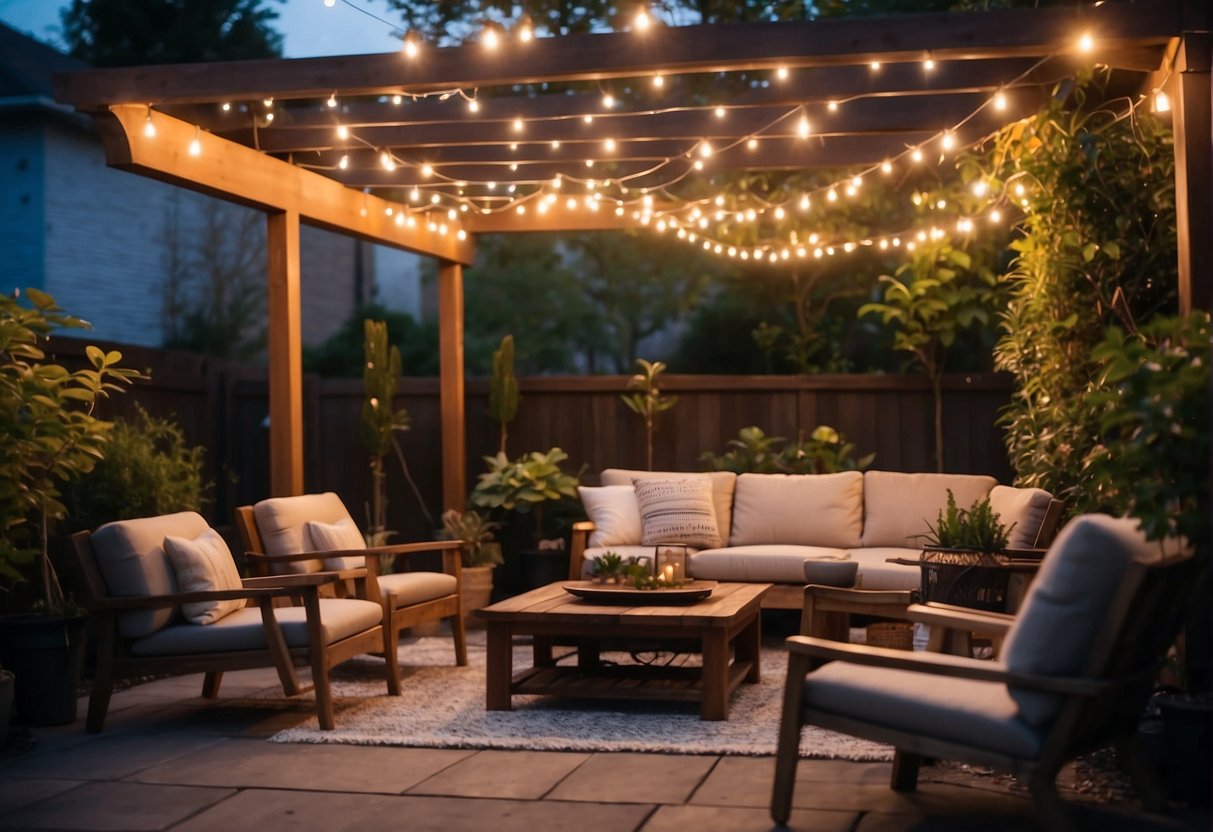
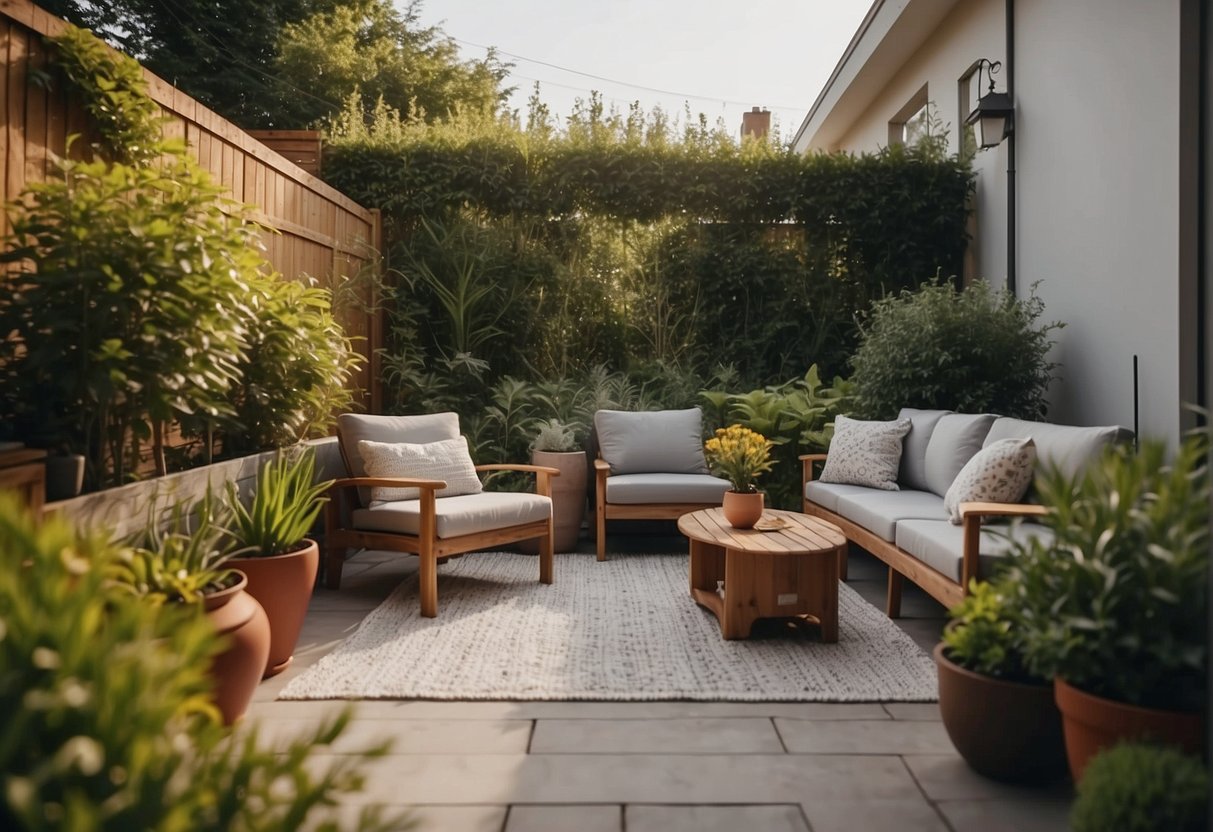
Designing an Outdoor Living Room
Creating the perfect outdoor living room can provide a cozy space for you and your family to relax and entertain guests. Before choosing furniture, focus on the layout and design of the space. Make sure there is enough room for the furniture, including an outdoor sofa and chairs, as well as space for people to move around comfortably.
A covered pergola can be a great addition to your outdoor living room, reducing heat, providing shade, and adding a touch of elegance. To ensure privacy, consider adding a privacy screen made of bamboo, lattice panels, or tall plants.
| Feature             | Options                    | Tips                                               |
|---------------------|----------------------------|----------------------------------------------------|
| Outdoor Sofa        | Sectional, loveseat, chaise| Choose a material that is weather resistant        |
| Covered Pergola     | Wood, metal, or vinyl      | Install in an area with ample seating space        |
| Privacy Screen      | Bamboo, lattice, plants    | Match the screen style to your outdoor room's theme|
Setting Up an Outdoor Kitchen
An outdoor kitchen can enhance your backyard, allowing you to cook, entertain, and enjoy meals al fresco. First, plan the layout of the kitchen: a U-shaped or L-shaped layout can maximize counter space and facilitate convenient cooking. Be mindful of the location of the electrical and plumbing outlets, as well as the distance from the indoor kitchen for easy access to supplies.
When selecting furniture and appliances, consider how they will hold up to the outdoor elements. Stainless steel and weather-resistant plastic are always favorable choices. Include a dining space with ample seating, either in a separate or integrated dining area.
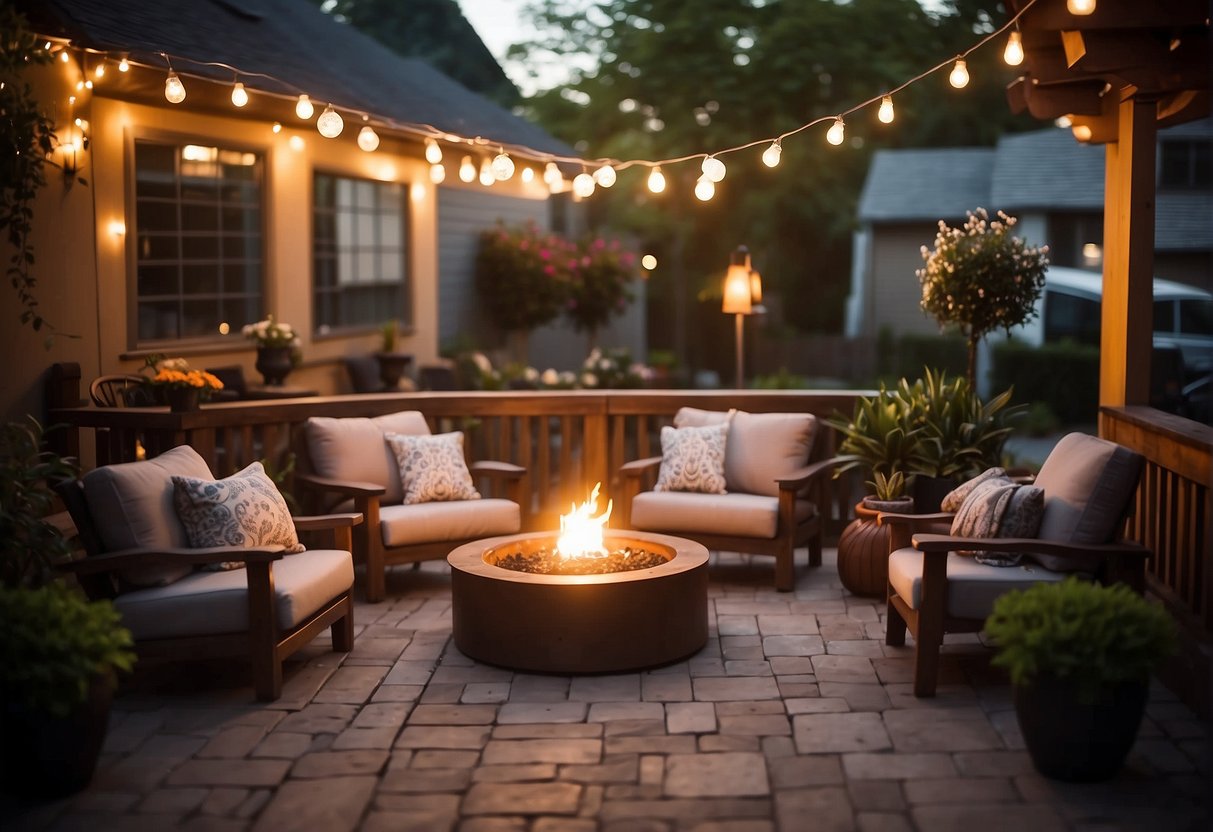
An outdoor fireplace or fire pit can serve as a focal point and create a warm ambiance. This feature can be as simple as a portable fire pit or a built-in masonry fireplace.
Example Outdoor Kitchen Checklist:
- Countertop material: Granite, concrete, or tile
- Appliances: Built-in grill, refrigerator, sink
- Seating: Barstools, dining table, chairs
- Lighting: Ambient, task, and accent lighting
By incorporating these elements, you can successfully design an outdoor living room and kitchen that cater to your lifestyle and add value to your home.
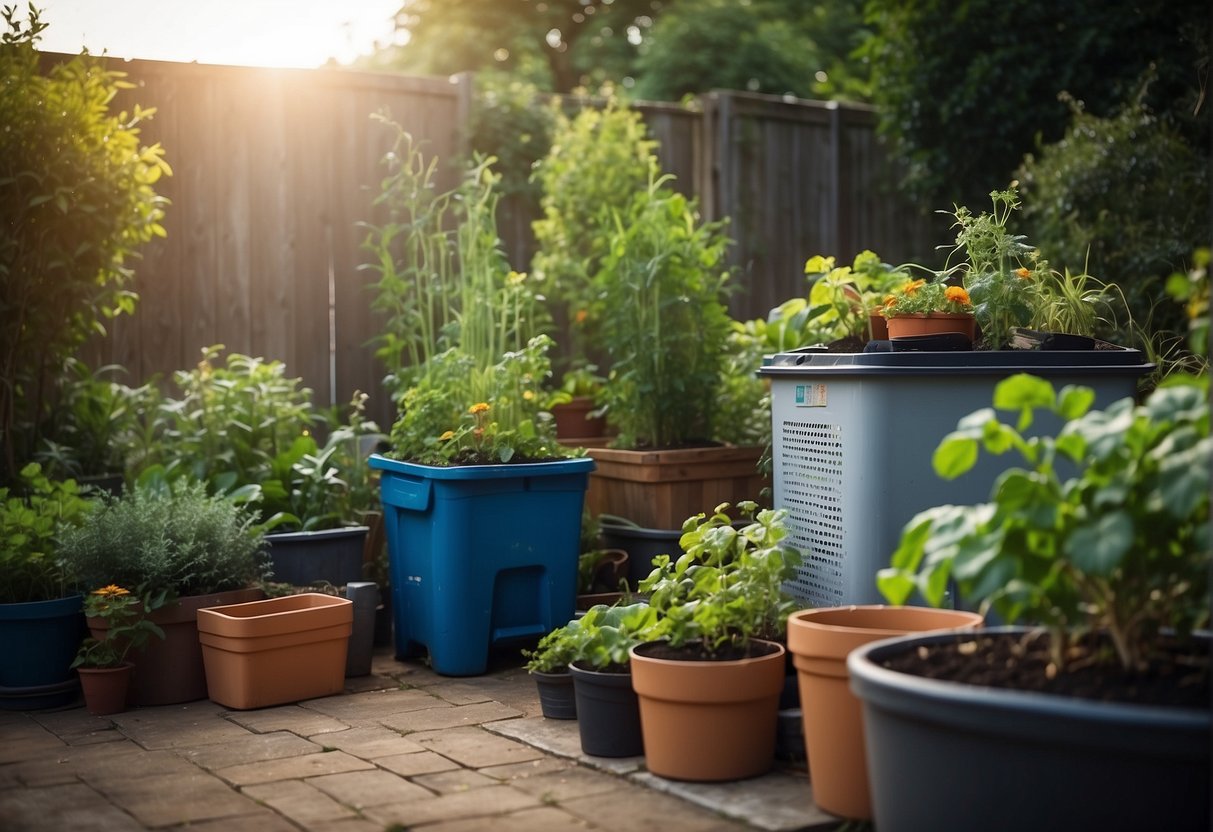
Landscaping and Garden Features
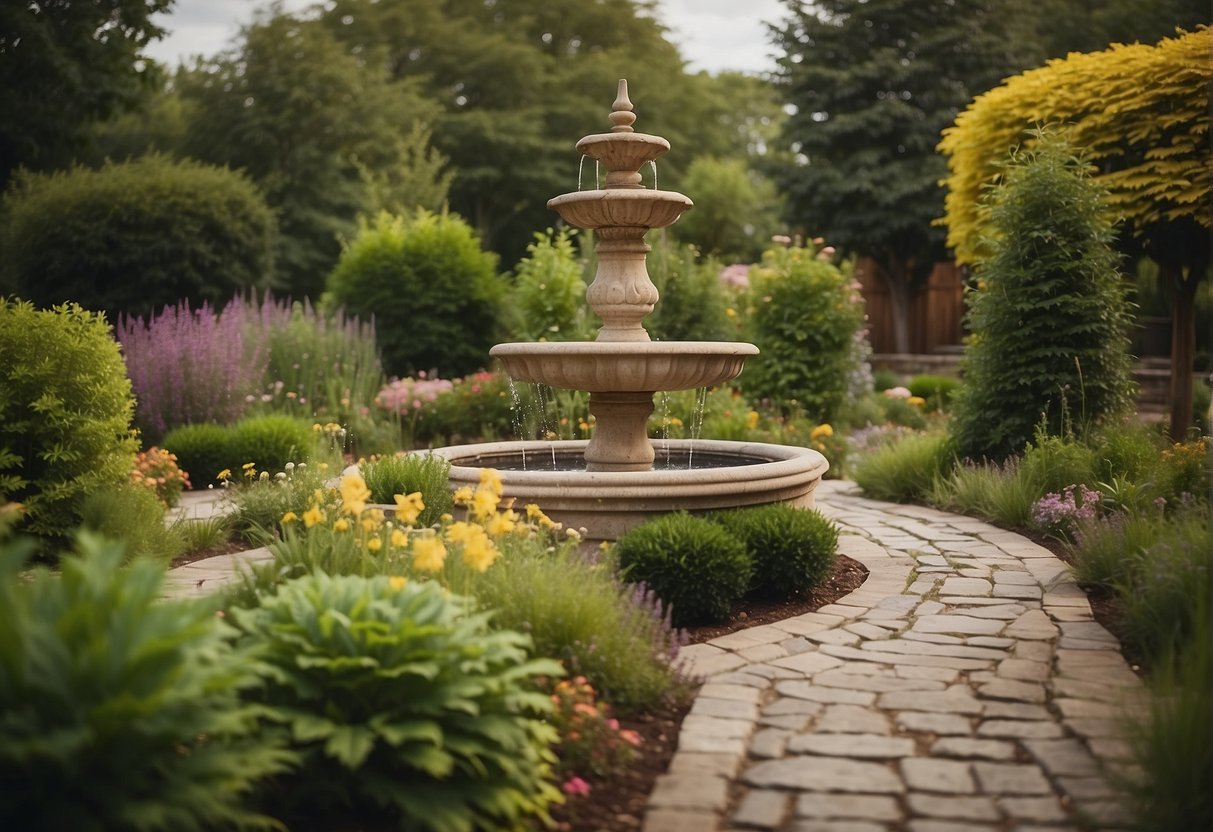
Planting a Backyard Herb Garden
Who wouldn’t want their very own herb garden in their backyard? Not only does it brighten up the landscape, but it also provides fresh herbs for cooking! To start, choose a sunny spot and prepare the soil by adding organic matter like compost or aged manure. If you don’t have a garden shed, now is the perfect time to consider installing one to store your gardening tools.
Once the area is prepped, decide which herbs to plant. Some popular choices include basil, chives, cilantro, mint, and oregano. Begin by planting the seeds or seedlings in the ground, following the recommended spacing for each herb variety. After planting, add a layer of mulch around the plants to help retain moisture, deter weeds, and insulate the ground. Maintaining your herb garden is a breeze! Just make sure to water them regularly and prune as needed to promote growth.
Building and Installing Window Boxes
A fantastic way to enhance your home’s exterior is by building and installing window boxes. They add color and charm while providing extra space for growing plants, flowers, and even herbs. First, measure your windows and purchase or build window boxes according to the size that best fits your home. Material options include wood, vinyl, and metal.
- Wood: A classic choice that can be painted or stained to match your home’s exterior.
- Vinyl: Low-maintenance and weather-resistant, vinyl window boxes won’t rot or decay.
- Metal: A durable option that can add a modern touch to your home.
When installing window boxes, be sure to use brackets or supports that hold them securely in place. Fill the boxes with potting mix, making sure to add drainage holes at the bottom to prevent waterlogging. Then, select plants that fit your desired design or color scheme and place them in the window boxes. Consider growing a combination of flowers, foliage, and herbs for an appealing and functional addition to your home.
Lighting and Decorative Touches
Installing Outdoor Lighting
Adding outdoor lighting to your home can significantly enhance the ambiance of your outdoor space. One popular and easy-to-install option is string lights. Simply hang them over a patio or along a fence to create a cozy atmosphere. For more outdoor lighting ideas, check out these 20 DIY Outdoor Decorating Projects That Take 30 Minutes—or Less.
If you’re feeling creative, consider crafting your own lighting fixtures using mason jars. Simply fill the jar with LED fairy lights or small solar-powered bulbs, seal it, and hang it on a fence or tree for a charming touch. Outdoor lighting not only provides illumination at night but also adds a touch of style and elegance to your space.
DIY Decorative Wind Chimes
Wind chimes can add a lovely accent to your outdoor area, as well as provide a soothing sound on breezy days. You can easily create your own wind chimes using materials you may have lying around the house.
Here’s a brief guide to making your own wind chimes:
- Choose a material for the chime tubes (copper pipes, bamboo, etc.)
- Cut the tubes to varying lengths for different tones
- Drill holes near the top of each tube
- String the tubes together using fishing line or sturdy string
- Attach the tubes to a circular or rectangular frame (wood, metal, etc.)
- Hang the finished wind chimes in a suitable outdoor location
By adding both lighting and decorative elements like wind chimes, you can transform your outdoor space into a comfortable and stylish area for relaxation and enjoyment.
Water and Weather Protection
Building a Rainwater Collection System
Creating a rainwater collection system is a fantastic way to conserve water and keep your outdoor spaces looking great, even in dry weather conditions. To start, you’ll need a gutter system to collect the rainwater from your roof. This can be as simple as attaching gutters and downspouts to your existing roof.
Next, you’ll need a large container to store the collected water, such as a rain barrel or a large plastic tank. Place the container under the downspout so that it catches the water as it flows down. Don’t forget to add a screen or net on top of the container to keep debris and insects out.
- Gutter system
- Downspouts
- Rain barrel or plastic tank
- Screen or net
Creating Natural Shade with Vines
One way to protect your outdoor spaces from the sun and wind is by creating natural shade with climbing plants or vines. These plants not only provide shade but can also enhance the beauty and privacy of your outdoor areas. Here are some popular vines for creating natural shade:
- Wisteria: This beautiful, fast-growing vine produces abundant, fragrant flowers and works well when trained over a pergola or arbor.
- Climbing Hydrangea: This deciduous vine attaches itself to walls and other surfaces with its aerial roots, providing a lovely, dense cover.
- Jasmine: Known for its sweet fragrance, jasmine is a versatile vine that can be trained to grow over fences, trellises, and walls to create shade and privacy.
- Trumpet Vine: This hardy, sun-loving vine produces large trumpet-shaped flowers and is an excellent choice for pergolas, arbors, or fences.
Remember, when choosing a vine for shade, consider factors like the climate of your area, the space available for the plant to grow, and the amount of sunlight or shade the area receives. Whichever vine you choose, add structures like trellises, arbors, or pergolas for them to grow and create the desired level of shade.
Furniture and Storage Solutions
Constructing a Potting Bench
A potting bench is a practical and stylish addition to any backyard oasis. Not only does it provide a convenient spot for repotting plants and organizing gardening tools, but it also adds a charming, rustic touch to the outdoor space.
To build a durable, DIY potting bench, consider using cedar wood, as it’s naturally resistant to rot and insects. To make the construction process manageable, gather the required materials, such as cedar boards, screws, and a saw, and follow these simple steps:
- Measure and cut the cedar boards to create the bench’s frame, legs, top, and shelves.
- Assemble the frame and attach the legs using screws, making sure they’re level.
- Attach the top and shelves to the frame, ensuring they’re secure and evenly spaced.
- For added functionality, consider incorporating hooks or a built-in storage compartment for tools and gloves.
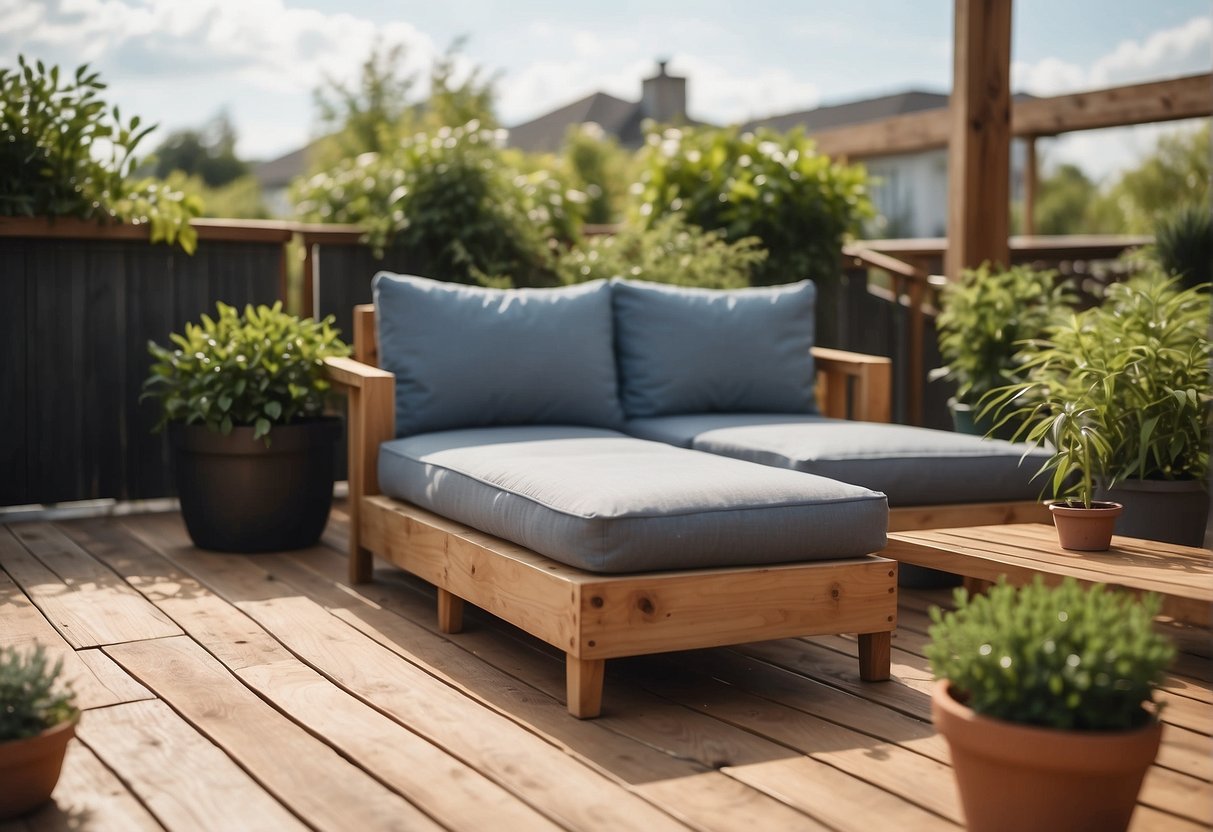
Upcycling Pallets into Furniture
One creative and eco-friendly way to furnish a backyard is by upcycling wooden pallets. Pallets can be transformed into a variety of outdoor furniture, including coffee tables, benches, and even planters.
To begin, gather some pallets, a saw, sandpaper, and paint or stain. Here are two ideas to consider when turning pallets into unique pieces of outdoor furniture:
-
Pallet Coffee Table: Start by cutting the pallet in half, then stacking one piece on top of the other. Sand all the surfaces to create a smooth finish and paint or stain, if desired. Finally, attach casters or small wooden legs to the bottom of the table to elevate it off the ground.
-
Pallet Bench: Remove any broken or damaged boards from the pallet, and then cut it into two equal sections. Create the bench seating by connecting the sections with wood pieces for added stability. Next, attach 2×4 legs to each corner of the pallet, ensuring the bench is level. Sand and finish the bench with paint or stain to perfect the look.
In conclusion, both the potting bench and upcycled pallet furniture are versatile and functional DIY backyard projects that effortlessly enhance an outdoor space. Ready to give it a try? Happy building!
Fences and Privacy Screens
Installing a Bamboo Privacy Fence
A bamboo privacy fence is an excellent addition to your backyard projects list. Not only is it eco-friendly, but it also adds an exotic touch to your outdoor space. First, gather the necessary materials, such as bamboo panels, posts, top and bottom rails, support brackets, and screws. It’s helpful to have a hammer, drill, and level on hand.
Start by measuring and marking the desired fence area. Dig holes for the fence posts and set them securely with gravel or concrete. Once they’re level and firm, attach the top and bottom rails to the posts using support brackets. Now, it’s time for the star of the show: bamboo panels.
Attach the bamboo panels to the rails with screws, ensuring they’re snug and secure. Continue this process until the entire fence is complete. Voilà! You now have a beautiful bamboo privacy fence in your backyard.
Creating a Lattice Screen for Climbing Plants
Another fantastic way to add privacy and a natural touch to your outdoor space is by creating a lattice screen for climbing plants. You’ll need wooden lattice panels, posts, top and bottom rails, brackets, and screws. Additionally, gather your hammer, drill, saw, and level. Don’t forget to pick out some lovely climbing plants, like clematis or climbing roses!
First, measure and mark the desired location for your lattice screen. Dig holes for the fence posts and set them using gravel or concrete. Make sure they’re level and sturdy. Attach the top and bottom rails to the posts with brackets, cutting them to size if necessary.
Now, attach the wooden lattice panels to the rails with screws, ensuring they’re secure and properly aligned. Once the lattice screen is in place, it’s time to plant your climbing plants at the base of the structure. Encourage these plants to grow onto the lattice by gently weaving their stems through the openings.
In time, your plants will cover the lattice, creating a beautiful, living privacy screen. Enjoy the view and know that you’ve crafted an elegant addition to your backyard paradise.
Eco-friendly and Budget-friendly Projects
Recycling Empty Wine Bottles for Garden Edging
One creative way to upcycle empty wine bottles while adding some flair to your garden is by using them for garden edging. Collect your wine bottles and clean them thoroughly before starting the project. Once you have enough bottles, dig a shallow trench along your garden beds or pathways, and place the bottles upside-down in the trench in a line. Not only will this add a unique touch to your garden, but it also helps prevent weeds from encroaching on your plants.
Using Gravel and Pea Gravel for Low-cost Patios
Creating a cozy, low-cost patio space can be as simple as using gravel or pea gravel. These materials are both budget-friendly and eco-friendly, as they allow water to seep back into the ground, reducing runoff. Start by marking the area where you want your patio and removing any grass or weeds. Next, lay a barrier fabric to prevent weed growth, and fill the area with a layer of crushed stone for a stable base.
On top of the base, spread a layer of either gravel or pea gravel. These smaller stones create a comfortable surface for walking and sitting on your newly created patio. Make sure to smoothen the surface and remove any sharp edges. Add some comfortable seating, a table.
For more ideas on how to achieve a backyard makeover on a budget, check out all the great resources available online. With a little creativity and effort, your outdoor space can become a beautiful, eco-friendly haven without breaking the bank.
Finishing Touches and Upkeep
Applying Protective Paint and Stains
A vital part of any DIY backyard project is ensuring its longevity. One way to achieve this is by using protective paint and stains. Not only do they enhance the appearance of the project, but they also shield it from various external factors such as sun and rain. For example, terra-cotta pots will look charming and last longer when treated with a coat of paint or a stain. Always choose the appropriate paint products that cater to your specific project, such as paint suitable for outside use.
Regular Maintenance Tips for Outdoor Projects
Just as important as the finishing touches, regular maintenance is crucial for keeping your outdoor projects in their best condition. Here are some low maintenance tips that can do wonders for your DIY backyard ideas:
- Keep it clean: It might seem obvious, but keeping your projects clean can significantly extend their lifespan. For instance, cleaning the fabric of any outdoor furniture can prevent mold and mildew and prevent color fading.
- Protection from the sun: Harsh sunlight can cause various materials to fade over time. To maintain the vibrant colors of your project, consider placing it under a shade or using products with UV protection.
- Inspections and touch-ups: Periodically check for any signs of wear and tear on your projects. Minor touch-ups with paint or sealant might be needed to ensure the longevity of your outdoor creations.
Taking a little extra time for finishing touches and regular upkeep will ensure that your DIY outdoor home improvement projects stay in excellent shape for years to come.
Luxury Specialist at McGraw Realtors
Bill Wilson has helped buyers and sellers throughout the Oklahoma City metro since 1995. Before entering real estate, he served as a U.S. Air Force fighter pilot and owned an office equipment business, experiences that shaped his disciplined, practical approach to advising clients. Bill works alongside his daughter, Heather Wall, as OKCHomeSellers at McGraw Realtors. Together, they specialize in luxury, move-up and distinctive properties throughout Oklahoma City, Edmond and surrounding communities. With more than 30 years of real estate experience, Bill has guided clients through changing markets, complex transactions and important life transitions. His approach is built on candid advice, thoughtful marketing and relationships that continue long after closing.