
DIY Kitchen Improvement Projects: Quick and Impactful Transformations
Embarking DIY kitchen improvement projects can be both rewarding and cost-effective. With a well-thought-out plan and the right tools, it’s possible to transform your kitchen into a stylish and functional space without breaking the bank. By focusing on key aspects such as layout, materials, and fixtures, even novice DIY enthusiasts can make significant improvements to their kitchen’s aesthetics and functionality.
Planning and creating a budget for your DIY kitchen project is crucial to ensure that it meets your needs and stays within your financial limits. Homeowners can avoid overspending and ensure a successful outcome by researching and selecting the appropriate materials and tools. Cabinet upgrades, lighting improvements, and backsplash installations are among the most popular and effective kitchen DIY projects catering to various skillsets.
Adding personal touches like unique fixtures or artwork can make a difference when enhancing your kitchen’s storage and shelving options. These simple yet impactful changes can dramatically elevate your space, turning it into a warm and inviting environment for you and your guests to enjoy.
Key Takeaways from DIY Kitchen Improvement Projects
- Plan your kitchen layout and budget to ensure a successful DIY kitchen improvement project
- Focus on cabinet upgrades, lighting improvements, and adding personal touches for maximum impact
- Enhance your storage and shelving while selecting appropriate materials and tools for a cost-effective renovation
Planning Your Kitchen Layout
Assessing Space and Function
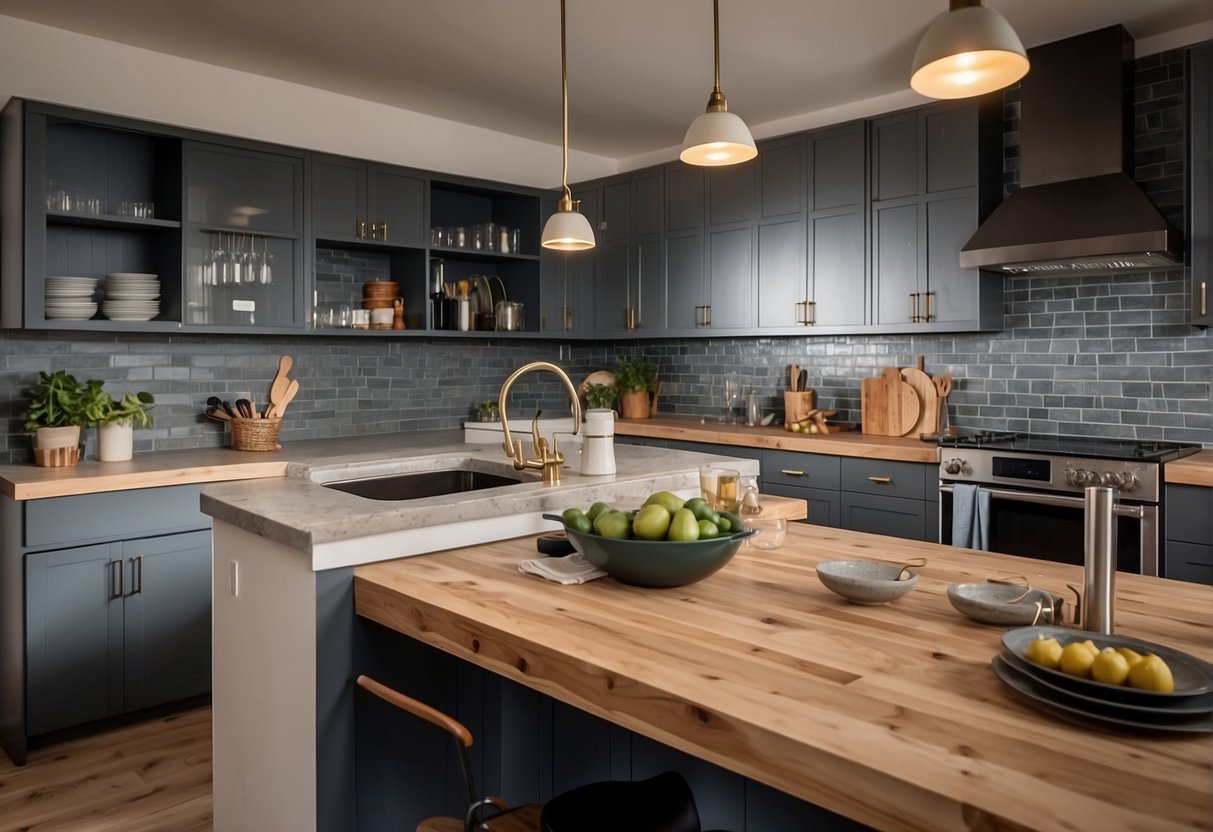
When planning your kitchen layout, the first step is to assess the available space and its function. Consider your kitchen’s overall size and how it will be used. For example, if you have a small kitchen, you’ll need to make the most of the limited space while still providing ample prep space and storage. Be sure to measure the entire room and clearly understand the dimensions.
It is also essential to think about the functions of your kitchen. Is it primarily used for cooking and meal prep, or do you also entertain family and guests? If you host gatherings frequently, you may want to consider incorporating a kitchen island, which can serve multiple purposes, such as a casual dining area or additional prep space.
Designing for Efficiency
An efficient kitchen layout is important, as it can save you time and energy during meal preparation. A well-designed kitchen will minimize the need to walk back and forth between different appliances and the sink. To achieve this, consider the work triangle principle, which states that the oven, refrigerator, and sink should be arranged in a triangular shape, providing an efficient workflow.
The Beginner’s Guide: DIY Kitchen Remodel on a Budget suggests finding ways to maximize the efficiency of your kitchen. Incorporating open shelves, for instance, can create storage solutions that are easily accessible without taking up much space. Also, look for ways to use vertical space for storage, such as installing magnetic spice racks on the wall or using a pegboard to hang pots and pans.
When planning your kitchen layout, keep in mind the importance of maximizing space and function, designing with efficiency in mind, and considering how the kitchen will be used. By considering these factors, you can create a kitchen that looks great and serves you well in your daily life.
Budgeting for Your DIY Kitchen Project

One of the primary concerns when undertaking DIY kitchen projects is working within a limited budget. Planning and allocating funds effectively is essential to ensure a smooth process.
Cost-Effective Materials
Opt for budget-friendly materials that will provide the functionality and aesthetics you desire without breaking the bank. Some materials to consider include:
- Laminate countertops: Inexpensive and available in various colors and patterns that can mimic the look of more expensive stone countertops.
- Plywood cabinets: Customize plywood cabinets with paint or stains for an affordable yet stylish storage solution.
- Peel and stick backsplash: This DIY-friendly option allows for easy kitchen updates without needing professional installation.
When looking for inspiration on what you can achieve with cost-effective materials, 25 Inspiring DIY Kitchen Remodeling Ideas That Will Frugally Transform Your Kitchen is a great starting point.
Budget Allocation
A balanced budget allocation will help you achieve your vision without overspending. A few tips to establish your priorities are:
- Make a list of all the tasks and components required for your project.
- Define your must-haves and nice-to-haves. Know the essentials and the areas where you can compromise.
- Comparison shop. Research prices and quality for the materials and appliances you wish to include.
- Allocate funds based on the priorities and material costs identified.
| Task | Estimated Cost | Priority |
|---|---|---|
| Cabinets | $X,XXX | High |
| Countertops | $X,XXX | High |
| Appliances | $X,XXX | Medium |
| Flooring | $X,XXX | Medium |
| Lighting | $X,XXX | Low |
Follow these budgeting tips, and your DIY kitchen project will be well on its way to a cost-effective transformation. Keep track of your spending, make adjustments when necessary, and enjoy creating the kitchen of your dreams.
Choosing the Right Materials and Tools
Selecting Countertops
When it comes to kitchen countertops, there are a variety of materials to choose from. Wood countertops are a popular choice for their warmth and natural beauty. They are available in numerous species, such as oak, maple, and walnut. To maintain their durability and appearance, proper sealing and regular maintenance are essential.
Pros:
- Warm and natural appearance
- Wide variety of wood species
Cons:
- Requires regular maintenance
- Susceptible to staining and damage from water and heat
Another popular option is quartz countertops. These are made from an engineered material that combines natural quartz with resins and polymers. They offer the durability and low-maintenance benefits of a hard surface with the attractive look of natural stone.
Pros:
- Durable and low-maintenance
- Resistant to staining and heat
Cons:
- Higher cost than some other materials
- Not as natural-looking as wood
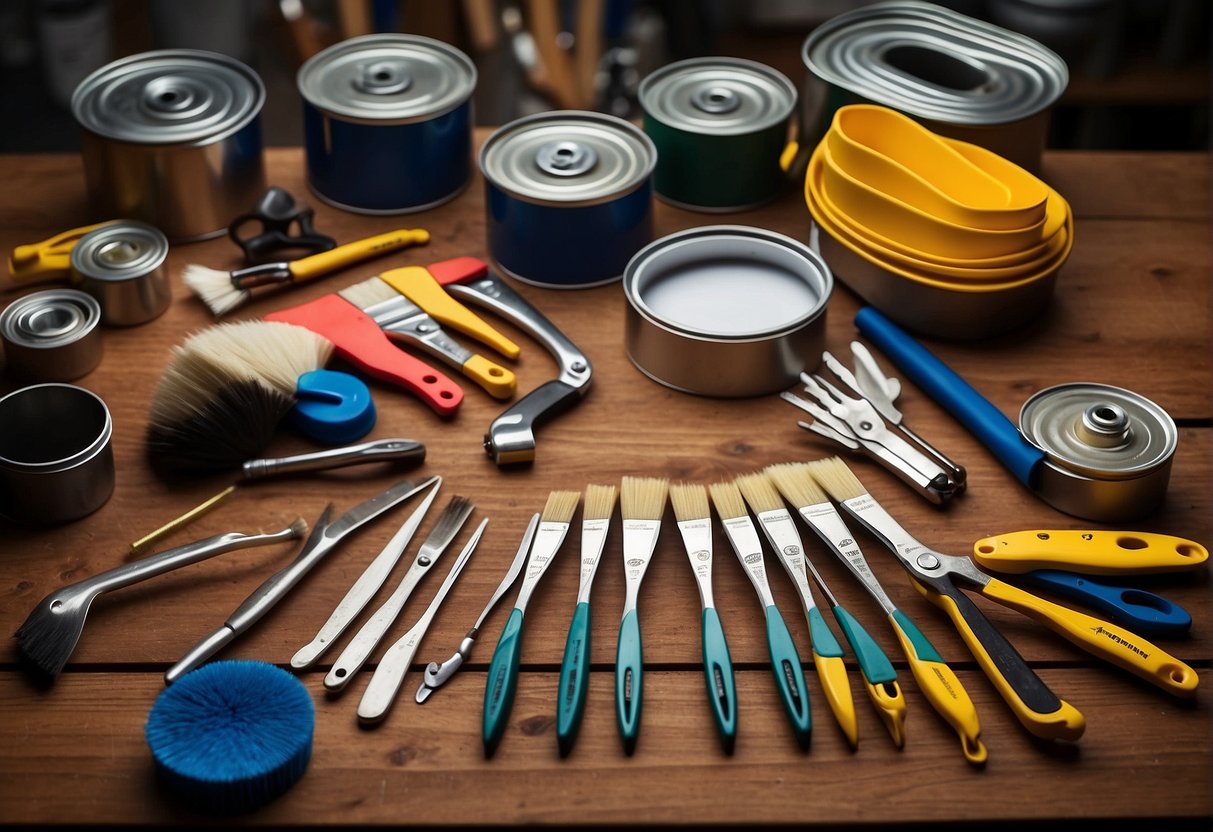
Picking Quality Paint
When it comes to painting kitchen cabinets, selecting a high-quality paint is key for a long-lasting and durable result. There are several factors to consider during paint selection:
- Type of paint: Look for paints specifically formulated for cabinetry, such as enamel or semi-gloss paints. These provide a smooth, easy-to-clean finish that resists chipping and staining.
- Color: Neutral colors, such as whites and grays, are popular choices for kitchen cabinets due to their timeless appeal and compatibility with various design styles.
- Primer: To ensure proper adhesion and coverage, select a high-quality bonding primer compatible with your chosen paint.
In addition to paint, consider updating the hardware on your cabinets to create a cohesive and updated look. New cabinet pulls and handles contribute significantly to the overall impact of your kitchen improvement project.
By carefully selecting the right materials and tools, you can achieve a successful DIY kitchen improvement project that enhances the look of your space and provides functional benefits and increased value for your home.
Cabinet Upgrades and Refinishing
Refacing and Painting Cabinets
Refacing your cabinets is a cost-effective way to give them a fresh look. This process involves replacing the cabinet doors and drawer fronts while keeping the original cabinet boxes intact. Choose from a variety of materials, such as laminate, wood, or even glass, to create a new and modern appearance.
Painting cabinets is another option to refresh your kitchen’s look. First, make sure to properly prepare the surfaces by cleaning, sanding, and priming them. Choose a high-quality paint specifically designed for cabinetry to ensure durability and a beautiful finish. Some popular paint options include:
- Oil-based paints: known for their durability and rich finish
- Latex paints: water-based, easier to clean up, and dries quickly
- Hybrid paints: combine the benefits of both oil and latex paints
Updating Cabinet Hardware
Swapping out old cabinet hardware is a simple but effective way to change the look of your kitchen. Consider the following factors when selecting new hardware:
| Factor | Considerations |
|---|---|
| Style | Match your hardware to the overall design of your kitchen (modern, traditional, etc.) |
| Material | Choose from various options, such as stainless steel, brass, or even glass |
| Function | Ensure the hardware is comfortable to use and easy to clean |
Before purchasing new hardware, measure the spacing and size of the current hardware. This will ensure a seamless and easy transition. Additionally, consider the finish of the new hardware. Some popular options include:
- Matte black: adds a modern and sleek touch
- Polished chrome: provides a clean and mirror-like finish
- Brushed nickel: offers a softer, subtle finish
In conclusion, performing cabinet upgrades and refinishing can significantly improve the appearance of your kitchen. Refacing and painting cabinets and updating cabinet hardware are effective methods of achieving an updated look without breaking the bank.
Improving Lighting and Fixtures

Installing Under Cabinet Lighting
Under cabinet lighting is a practical and stylish addition to any kitchen. It provides better visibility when preparing meals, creates ambiance, and even makes the room more spacious. Several DIY options are available for this project, including puck lights, LED strips, and light bars.
Before starting, measure the length of your cabinets and decide on the type and number of lights you’ll need. When installing, be sure to space the lights evenly for a balanced appearance. Typical spacing is 8-12 inches apart. Plan a route for the wires to avoid clutter and ensure a neat finish.
Follow these basic steps for most under cabinet lighting installations:
- Turn off the power to the kitchen.
- Mark the locations for the lights, keeping them evenly spaced.
- Attach the lights using the included hardware or adhesive.
- Connect the wires to the lights and power source.
- Test the lights and make any necessary adjustments.
Upgrading Light Fixtures
Replacing dated or damaged light fixtures can instantly improve your kitchen’s aesthetic without breaking the bank. With a wide range of styles available, you can easily find one that complements your existing décor. To complete this DIY project, gather some necessary tools, including a screwdriver, a wire stripper, and a voltage tester.
Here is a brief overview of the steps for upgrading light fixtures:
- Turn off the power to the kitchen and remove the old light fixture.
- Disconnect the wires from the old fixture using the wire stripper.
- Attach the new fixture’s mounting bracket to the ceiling or wall.
- Connect the wires (typically black for hot, white for neutral, and green or bare for ground) by twisting the ends together and securing them with wire nuts.
- Attach the new fixture to the bracket per the manufacturer’s instructions.
- Install light bulbs and turn on the power to test the new fixture.
By following these steps and properly planning your DIY kitchen improvement projects, you can create a more appealing environment with improved lighting and fixtures.
DIY Backsplash and Wall Finishes
Applying Peel-and-Stick Backsplash
A peel-and-stick backsplash is an affordable and easy-to-install option for those looking to upgrade their kitchen. These backsplashes come in various styles, such as vinyl, metal, and even glass. To install, simply follow these steps:
- Clean the wall surface: Ensure the wall surface is clean and free of dust, grease, or any other residue.
- Measure and cut: Measure the area where the backsplash will be placed and cut the peel-and-stick material to the desired size.
- Peel and stick: Carefully remove the backing and gradually apply the material to the wall, smoothing out any bubbles as you go.
- Trim excess: Use a utility knife to trim any excess material and achieve a clean finish.
Decorating with Wallpaper
Wallpaper is another popular choice for adding a touch of style and character to your kitchen walls. Whether you opt for a bold pattern, a subtle texture, or a faux finish, wallpapers can significantly enhance the overall appearance of your kitchen. Here are some useful tips for applying wallpaper:
- Choose the right type: Opt for a wipeable and moisture-resistant wallpaper specifically designed for kitchen use.
- Prep the walls: Clean and prime the walls to ensure a smooth and lasting application.
- Measure and cut: Measure the length of the wall and add a few extra inches to account for trimming. Cut the wallpaper accordingly.
- Apply adhesive: If it’s not pre-pasted, apply an even layer of wallpaper paste to the back of the wallpaper with a brush or roller.
- Hang the wallpaper: Starting at the top, carefully hang the wallpaper and smooth it onto the wall. Use a wallpaper smoother to eliminate any air bubbles and ensure a neat application.
- Trim excess: Trim the excess wallpaper at the top and bottom edges for a clean finish.
Both backsplash and wallpaper solutions offer versatile and visually appealing ways to spruce up your kitchen space without breaking the bank. Keep in mind, that while these DIY options are more budget-friendly, hiring a professional may be worth considering for more complex projects or if you’re unsure about your abilities.
Enhancing Storage and Shelving
Building Open Shelving
Open shelving is a popular and practical solution for maximizing storage space in the kitchen. It provides easy access to frequently used items and can be a stylish way to showcase dishware, cookbooks, or decorative items. To begin, measure the desired wall area, select an appropriate shelf material (such as wood or metal), and plan the proper bracket placement.
Use a level to ensure straightness and secure the brackets with the appropriate hardware when installing. Attaching the shelves to wall studs for optimal support, especially for heavier items, is essential. Consider painting or staining the shelves to complement or contrast your kitchen’s color scheme for a custom look.
Organizing a Pantry
A well-organized pantry can dramatically improve the functionality of a kitchen and reduce clutter. Utilize clear storage containers with lids, to easily see what’s inside and maintain freshness. Label each container with its contents and expiration date. Implement a system for sorting items by categories, such as baking ingredients, snacks, and canned goods. This will make it easier to find what you need quickly and keep track of inventory levels.
A spice rack can be installed inside a pantry door, on a wall, or built into a pull-out drawer for added convenience. Rotating spice racks or tiered shelves are also excellent options for maximizing storage space and making spices easily accessible.
To further enhance your pantry organization, consider any of the following methods:
- Use shelf dividers or risers to create separate sections and optimize vertical space.
- Install hooks or pegboard on the inside of pantry doors for hanging items like measuring cups and spoons.
- Place lazy Susans in the corners to make full use of space and give easy access to items.
- Designate a space for a grocery list and meal planning sheet to monitor pantry items and reduce food waste.
By incorporating open shelving and focusing on pantry organization, you can create a more functional and visually appealing kitchen space. Utilizing a variety of storage solutions and maintaining an organized system will simplify meal preparation and contribute to a more enjoyable cooking experience.
Adding Personal Touches
Adding personal touches can greatly improve the overall design and functionality when revamping your kitchen. Incorporating elements of your style can make your kitchen upgrades truly unique and enjoyable. This section’ll discuss how to create a DIY Coffee Bar and add DIY Seating and Furniture.
Creating a DIY Coffee Bar
A DIY Coffee Bar can be an excellent addition to your kitchen, providing a dedicated space for enjoying your morning routine or post-dinner coffee. Start by selecting an area in your kitchen with ample counter space and accessible outlets. Next, consider the organizational aspects such as accessible shelves, cup holders, and storage containers. You can opt to either purchase ready-made furniture or create your own custom designs to suit your style.
To further enhance your coffee bar, consider the aesthetics. Choose colors, materials, and finishes that complement your kitchen’s overall design. Add decorative elements such as artwork, lighting, and plants to make the area inviting and personalized. For more inspiration on diy kitchen renovation ideas, visit 30 DIY Kitchen Renovation Ideas to Inspire You.
DIY Seating and Furniture
Creating practical and stylish seating is an essential aspect of your kitchen upgrade. Consider repurposing old chairs, stools, or benches by giving them a fresh coat of paint or reupholstering in new fabric. This cost-effective method will not only add seating to your kitchen but also exemplify your personal style.
When selecting kitchen furniture, prioritize functionality and size compatibility with your space. If your kitchen is small, consider compact or folding options that won’t take up much space when not in use.
For a custom touch, DIY tables and countertops can greatly enhance your kitchen’s functionality. Build your table from reclaimed wood or look more modern with metal and glass elements. Likewise, consider adding a functional island with built-in storage or seating options.
Final Thoughts About DIY Kitchen Improvement Projects
Incorporating DIY kitchen remodel ideas into your home can lead to an impressive transformation that leaves your cooking space more practical and modern. The key to a successful kitchen improvement project is careful planning, budget considerations, and openness to creativity.
Begin by identifying areas in your kitchen that need improvement, such as countertops, cabinetry, or walls. Evaluate the materials and color schemes that best fit your overall design aspirations. A variety of resources, such as online forums and expert advice, can also help to identify outstanding ideas.
Before starting, consider the following aspects of your DIY kitchen remodel:
- Budget: Determine an appropriate budget for the project, considering factors like materials, tools, and any required professional help.
- Functionality: Ensure that your new design is both aesthetically appealing and remains practical for day-to-day use.
- Ease of execution: Choose projects that are manageable based on your skill level and available time.
Here are some popular kitchen remodel ideas to consider for your DIY project:
- Countertop replacement: Select cost-effective materials like laminate or butcher block to refresh your countertops.
- Cabinet updates: Modernize your cabinetry with new hardware, paint jobs, or refacing.
- Open shelving: Replace upper cabinets with open shelves or floating shelves to create a more spacious feel.
- Tile work: Update your backsplash with new tiles or even vinyl adhesive for a cleaner, more contemporary look.
Keep in mind that certain upgrades, such as electrical or plumbing work, may require professional assistance. DIY kitchen remodeling projects can be fun, affordable, and satisfying when approached with confidence, knowledge, and a clear understanding of your goals.
Luxury Specialist at McGraw Realtors
With a diverse background, including a career as an Air Force fighter pilot and entrepreneurship, Bill transitioned to real estate in 1995. Co-founding Paradigm Realty with his wife, Charlene, he quickly rose to prominence in Oklahoma City’s luxury real estate scene. Now, as one of the top agents with annual sales surpassing $20 million, Bill’s dedication to exceptional service remains unparalleled. With a legacy spanning over two decades in the industry, Bill’s expertise and commitment make him a trusted name in luxury real estate.